


How to Replace Your Garage Door Motor with Richmond’s GDR150
The Richmond GDR150 Garage Door Opener is a remote-controlled garage door motor for residential sectional and tilt panel garage doors. It is suitable for single and double doors up to 15m² and features a belt drive system, built-in LED lighting, rolling code remote security, and compatibility with Richmond’s SmartR Home WiFi Smart Switch GTR131 for smartphone control.
This guide outlines the main setup process shown in the GDR150 manual, from pre-installation checks through to programming the door travel limits and testing obstruction detection.
Important: Always read the full Installation Manual before installation. Incorrect installation can affect operation and safety.
Before You Start
The GDR150 Garage Door Opener is designed for residential spring-balanced tilt panel and sectional garage doors up to 15.0m². The manual lists a maximum door width of 5600mm, maximum door area of 15.0m², and a standard maximum door height of 2400mm, with extension options available for taller doors.
The opener kit includes the motor, segmented rail and belt, wall bracket, door bracket, connecting arm, roof mounting brackets, manual release cable, hardware, and two GTR179 remote controls.
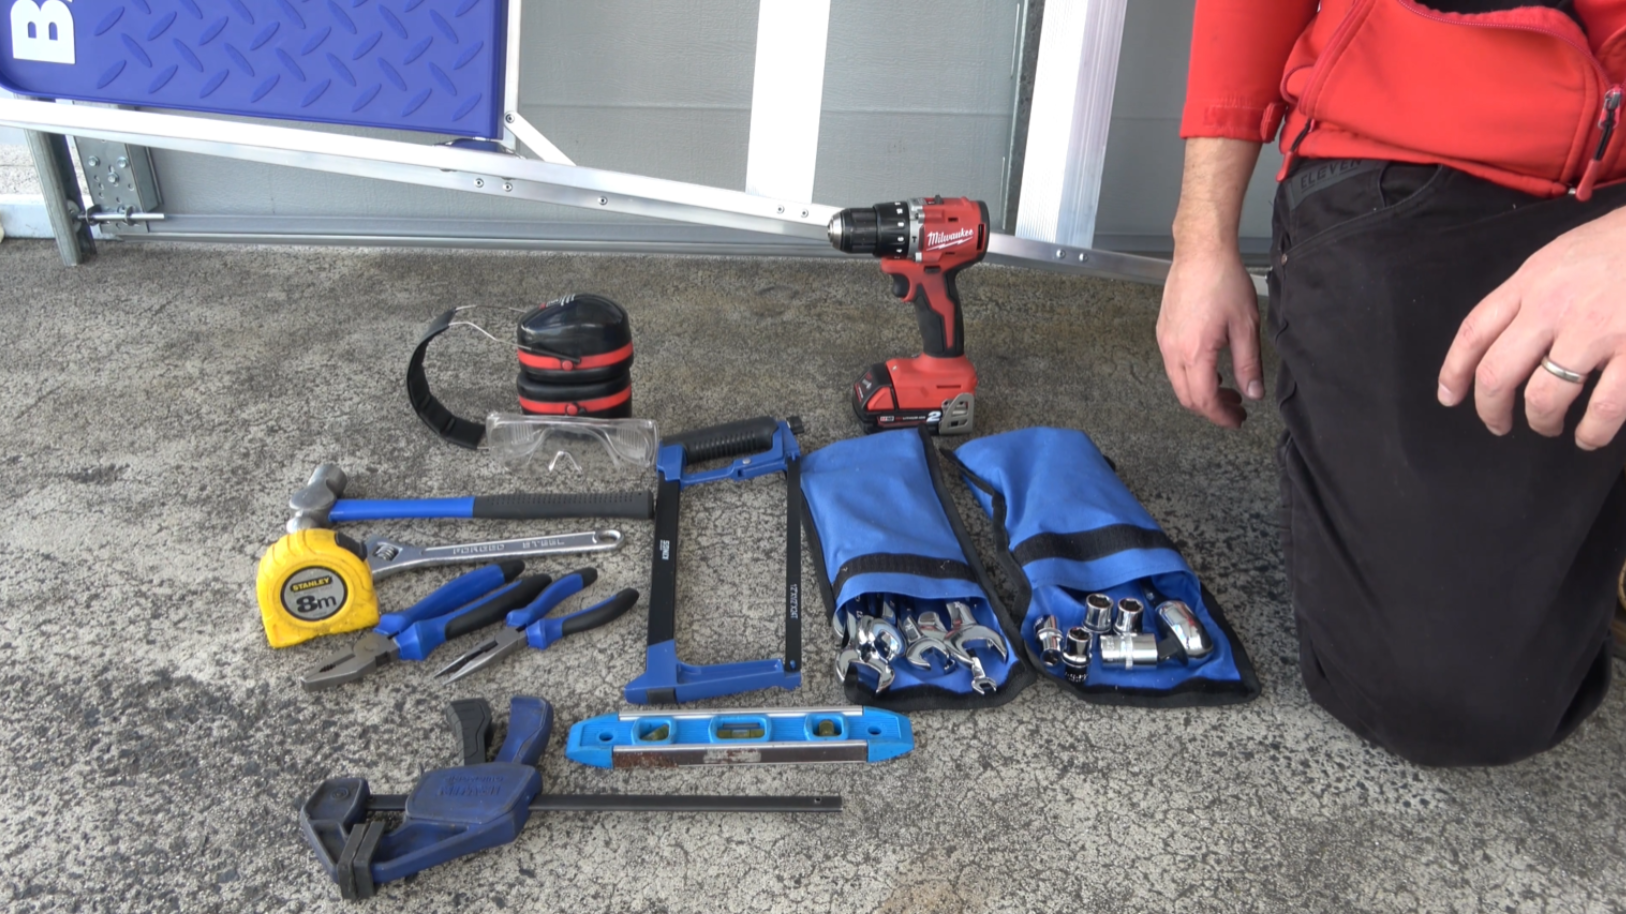
Tools Required
Before installation, gather the required tools. The GDR150 manual lists common installation tools including a ladder, spirit level, tape measure and pencil, power drill and drill bits, pliers, shifter, hammer, hacksaw, screwdrivers, safety glasses, and earmuffs.
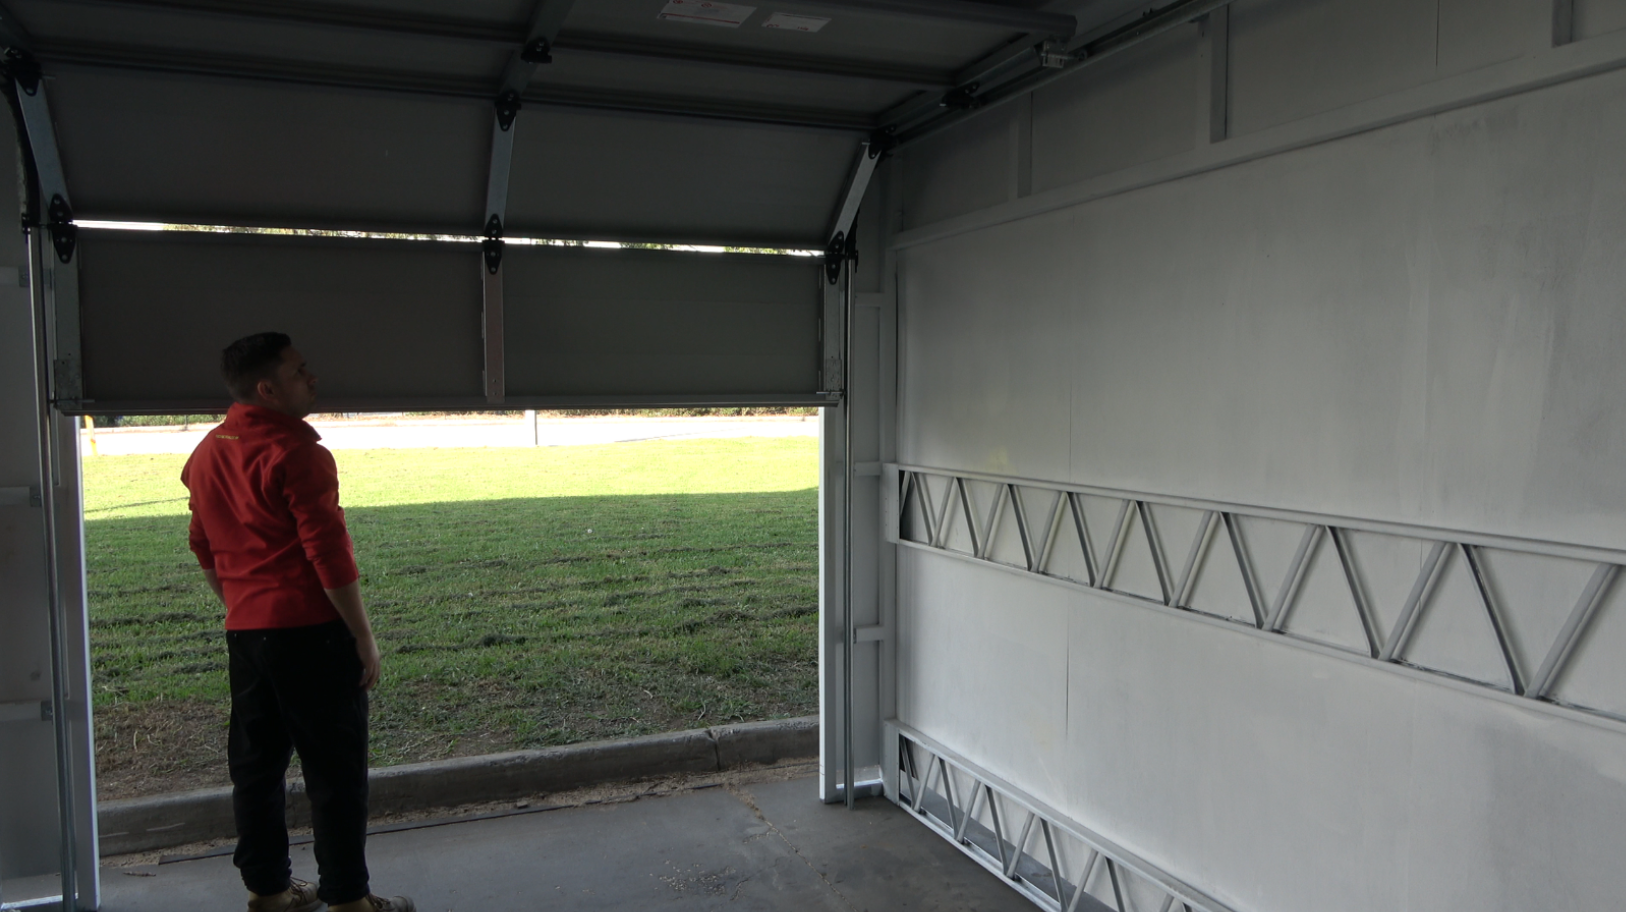
Step 1: Complete the Pre-Installation Checks
Before fitting the opener, check that the garage door moves freely by hand. A well-balanced and correctly sprung door is essential for safe and reliable operation.
Raise the door halfway and release it. A balanced door should stay in place, supported by the springs. Then raise and lower the door slowly by hand to check for binding, sticking, or excessive resistance. If the door binds or is difficult to move, it may need servicing before the opener is installed.
Confirm that a 240V mains power point is located close to the installation point. Power cables must be kept clear of the door’s moving area.
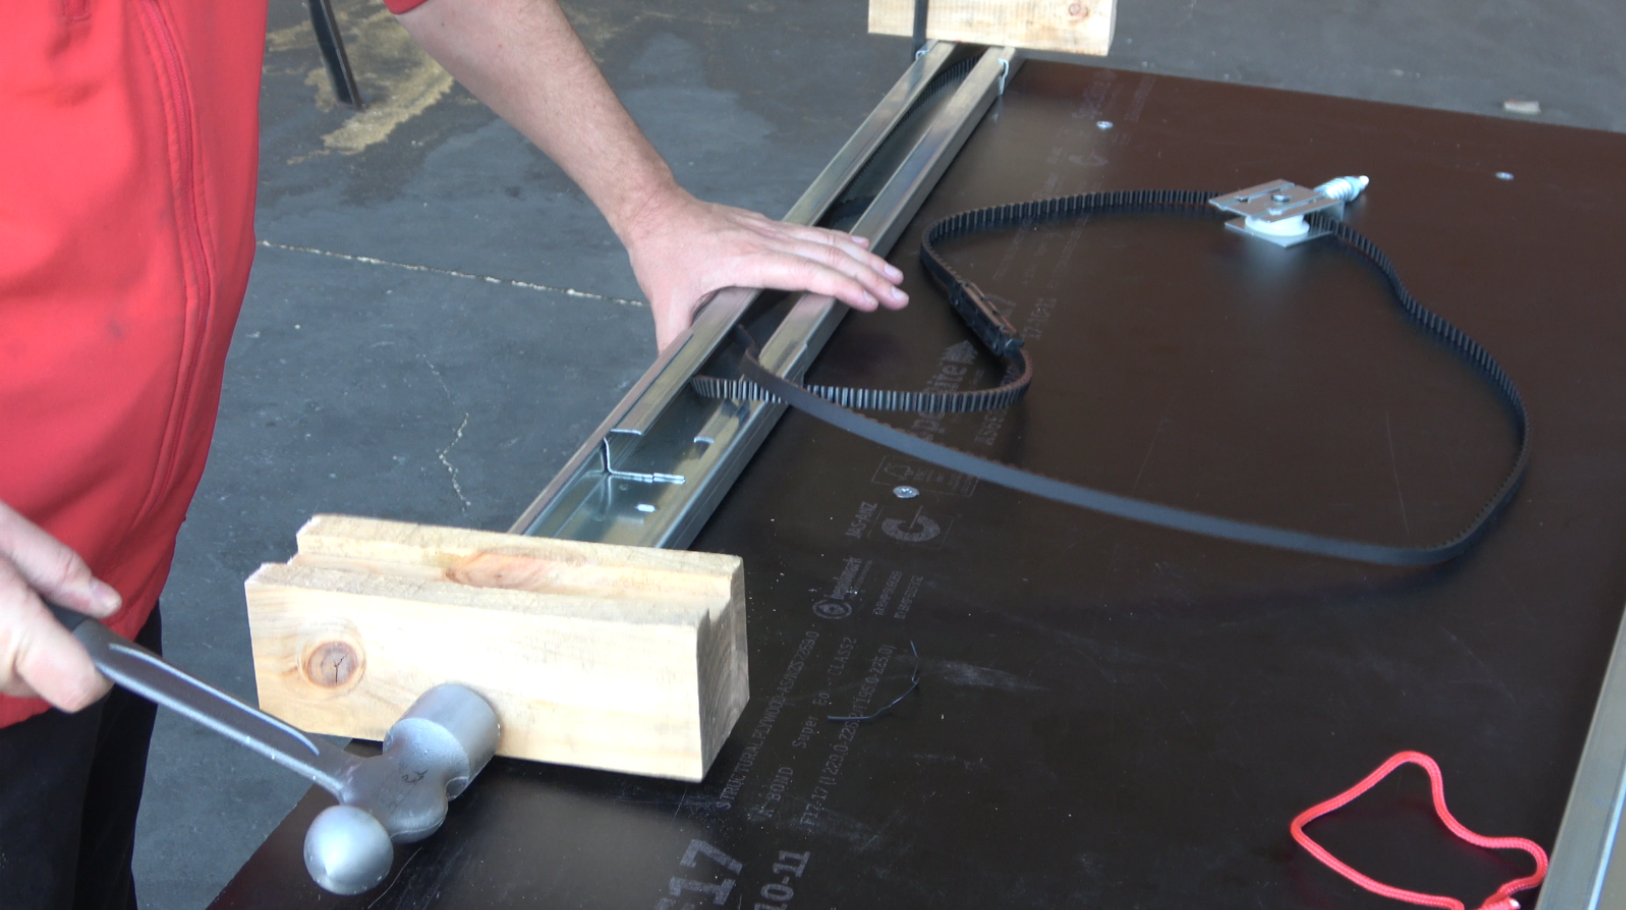
Step 2: Assemble the Segmented Rail
Lay the rail pieces on a flat surface. Start with rail section #1, which contains the drive gear and belt. Pull the bracket, bolt, and drive belt from the end of the rail so the belt is loose, while leaving the drive gear assembled in the rail.
Slide the sleeve onto rail section #1, then insert rail section #2 until the two sections meet in the middle. Repeat the process with the second sleeve and final rail section. Before fitting the final rail section, make sure the belt is sitting inside the rail and is not twisted.
Once the final section is connected, slide the bracket to the end of rail section #3 and push the bolt through the end hole. Attach the spring and nut to the bolt. This nut will be used to tension the belt.
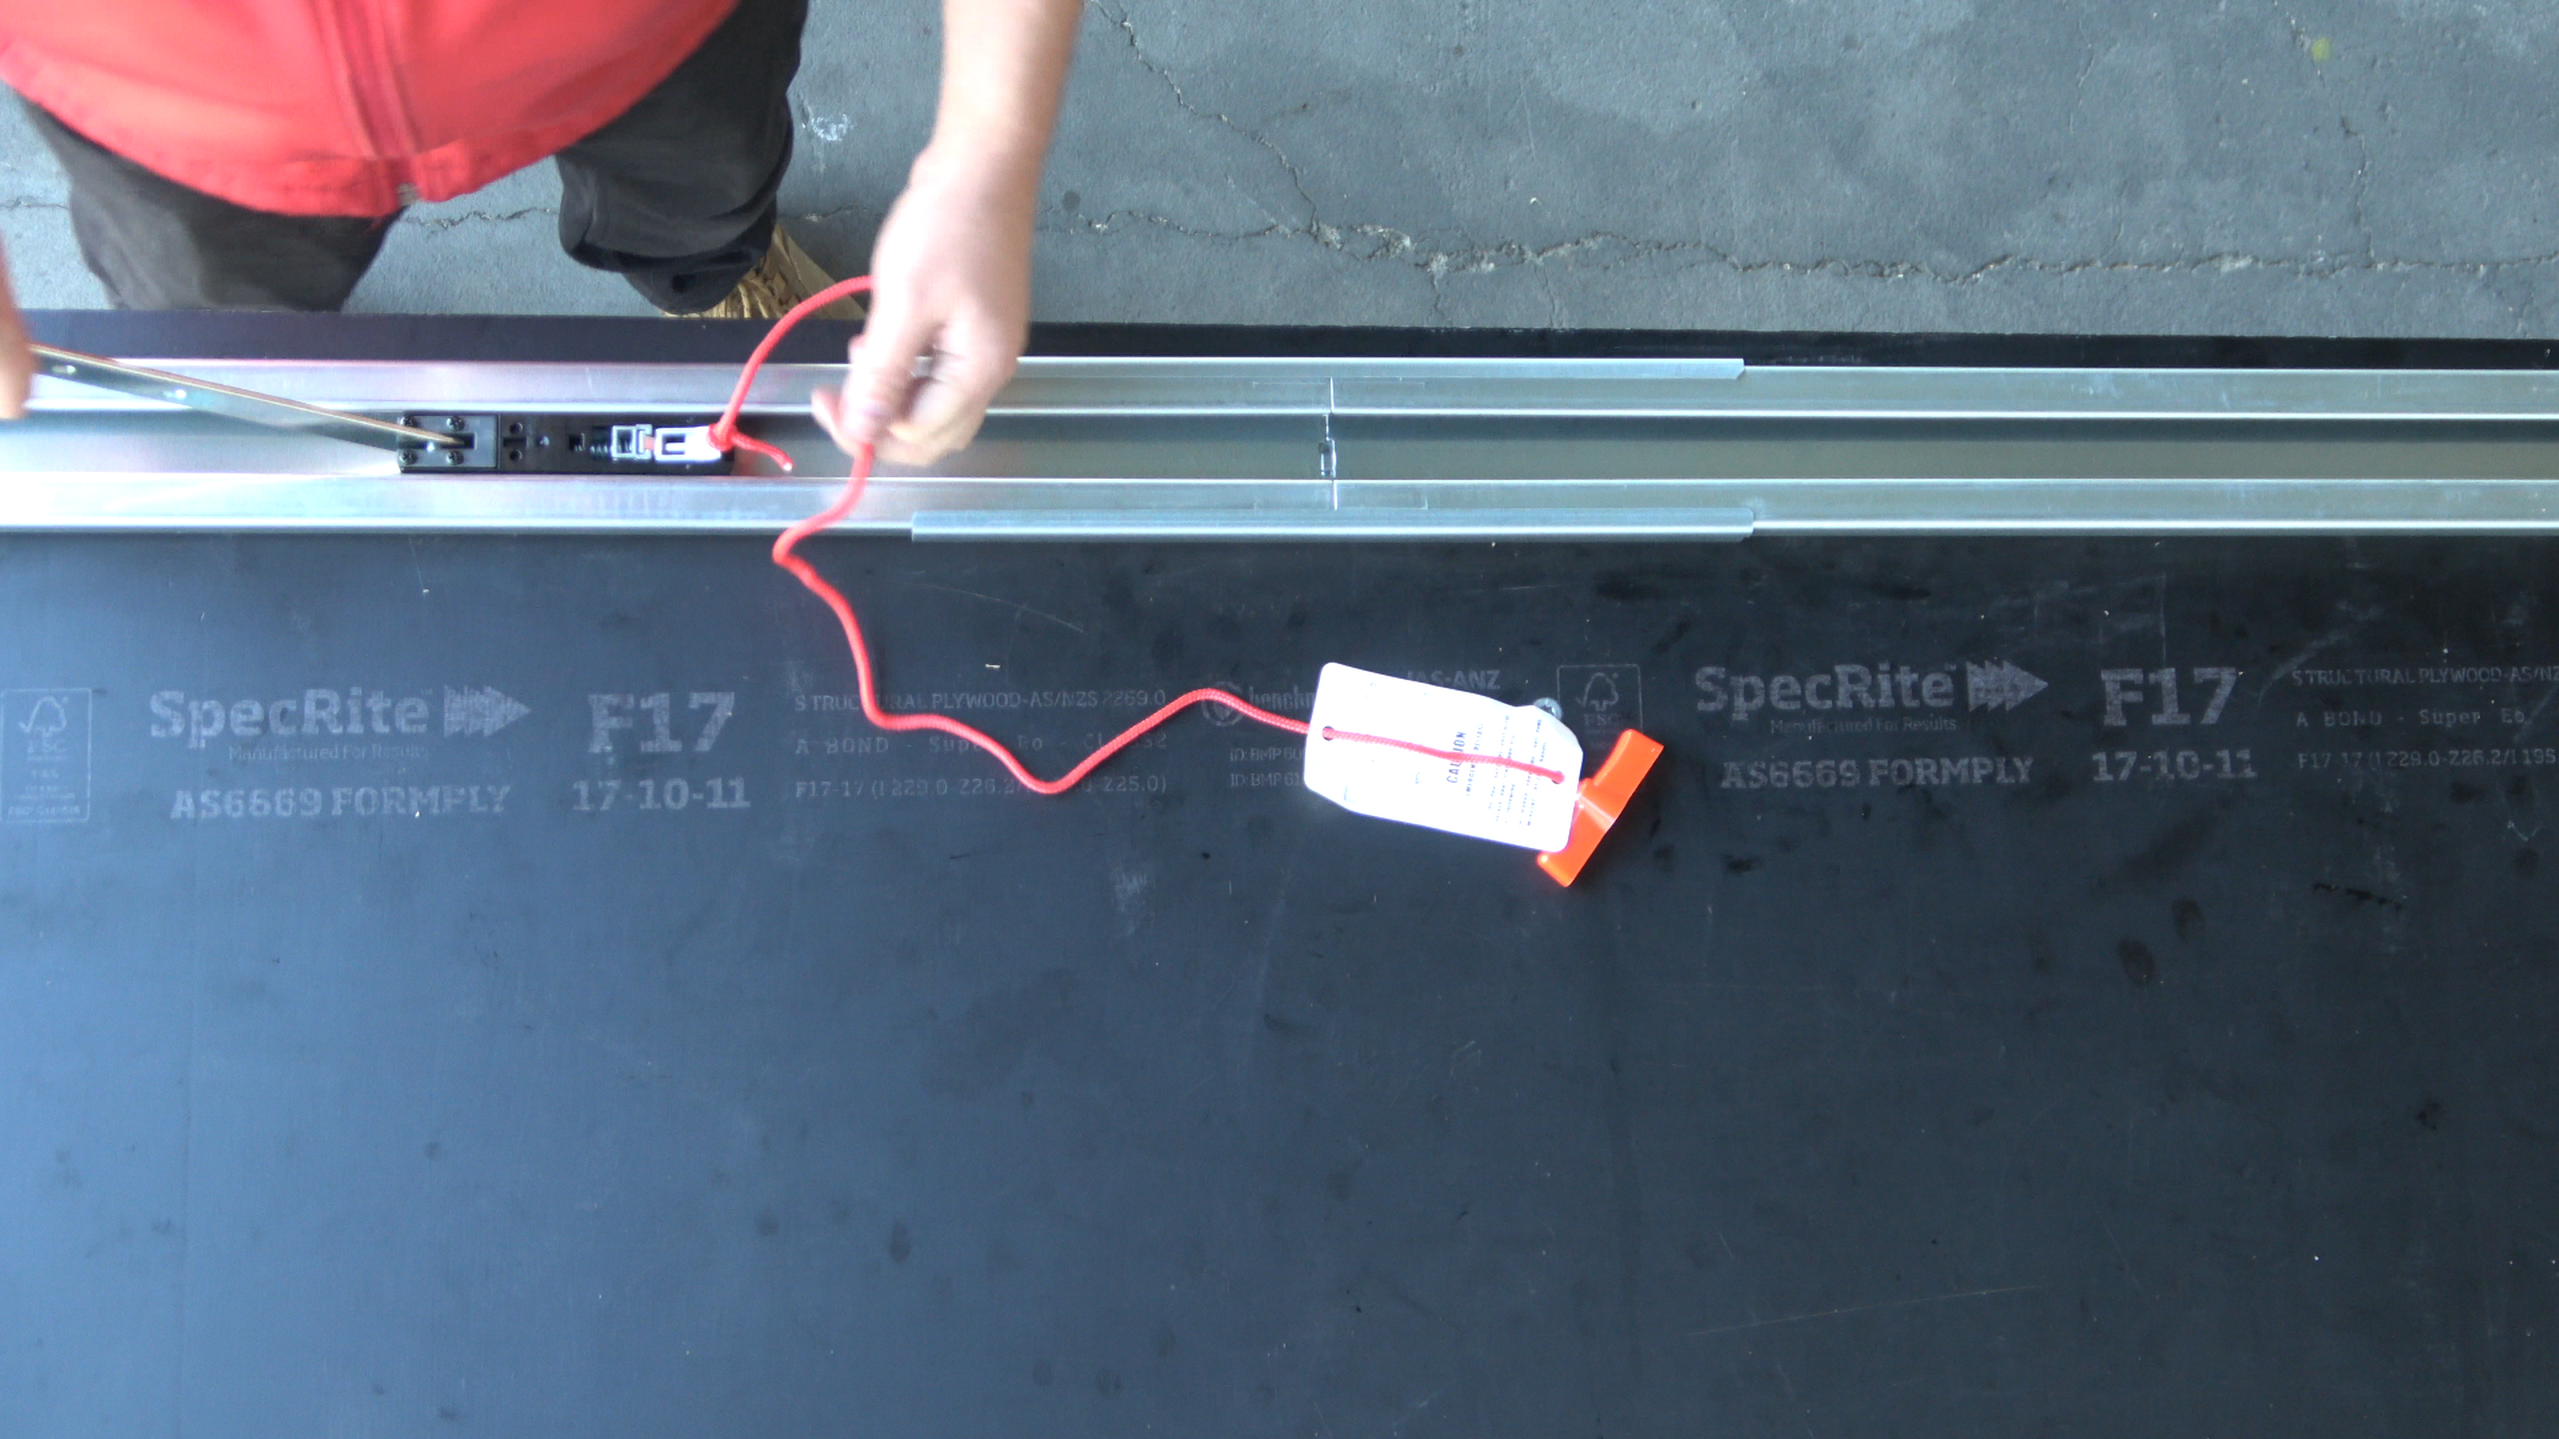
Step 3: Attach the Manual Release Cord
Attach the manual release cord to the motor rail trolley. The manual release allows the garage door to be operated by hand during a power outage or emergency.
The red handle should not be used to open and close the door during normal powered operation.
Once installed, the manual release handle should be easy to reach and less than 1.8m from the floor.
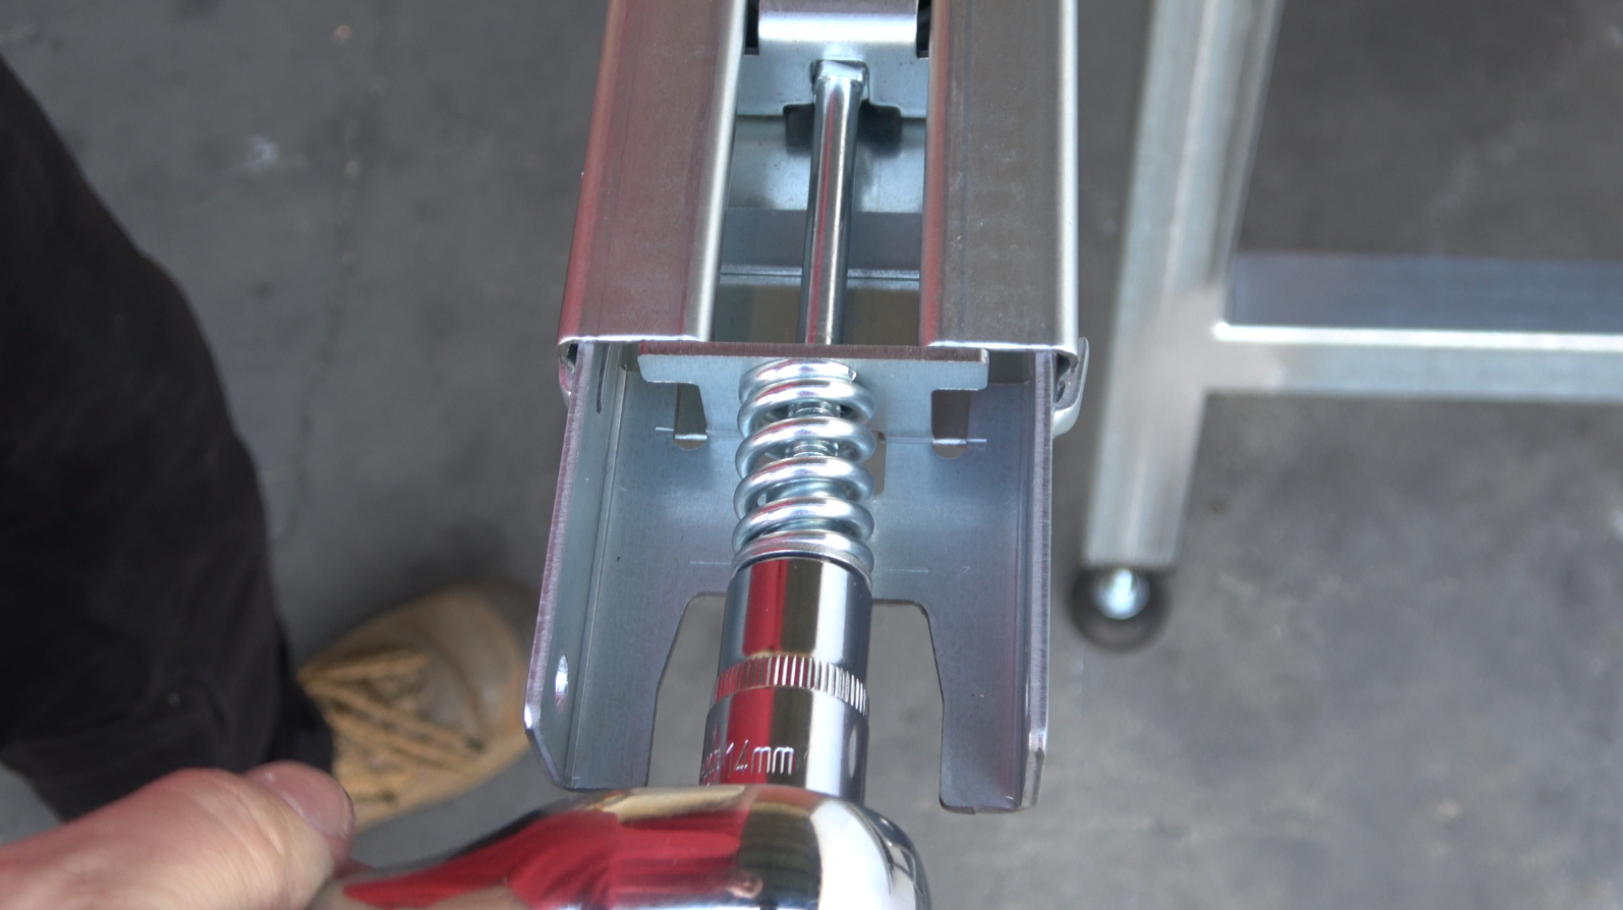
Step 4: Adjust the Belt Tension
Turn the nut clockwise until it threads onto the bolt and begins to tighten the belt. Do not overtighten the nut, and do not fully compress the spring.
A correctly tensioned belt should still be able to flex by approximately 35mm. The remaining spring and belt tension help provide flex during operation and avoid overloading the opener.
Step 5: Fasten the Rail to the Opener
Place the opener on cardboard or cloth to protect it from scratches.
Fit the assembled rail onto the drive gear section of the motor, making sure the open section of the rail points downward toward the floor. Push down to fix the rail to the motor, then fit the two brackets to secure the rail in place.

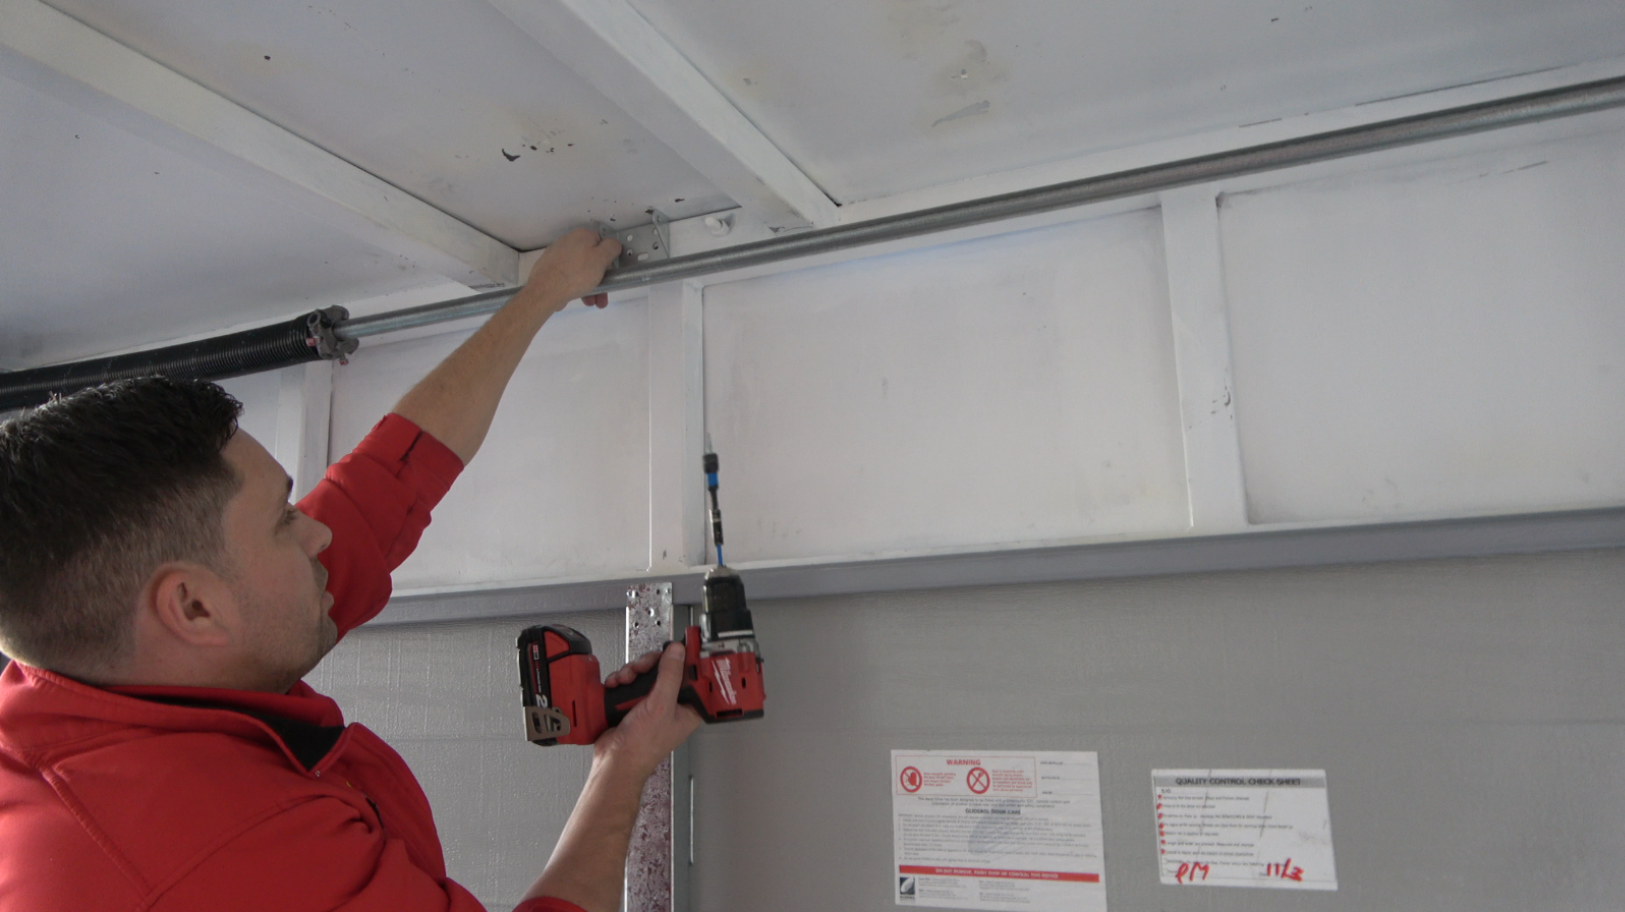
Step 6: Mount the Wall Bracket
With the door closed, mark the vertical centre line of the garage door and extend the line onto the header area.
Open the door to its highest point of travel, then measure the height. The horizontal centre of the header support should be 50mm above the highest point of travel.
Place the wall bracket in position, mark the fixing holes, drill the holes, and fasten the wall bracket securely. Fasteners are not supplied, so use fixings suitable for the wall structure.
Step 7: Attach the Rail to the Wall Bracket
Place the opener in the original packaging for protection, with the opener furthest from the door.
Lift the drive rail so it can connect to the wall bracket. Line up the holes, insert the pin through the bracket and rail, and secure it using the supplied hairclip pin.

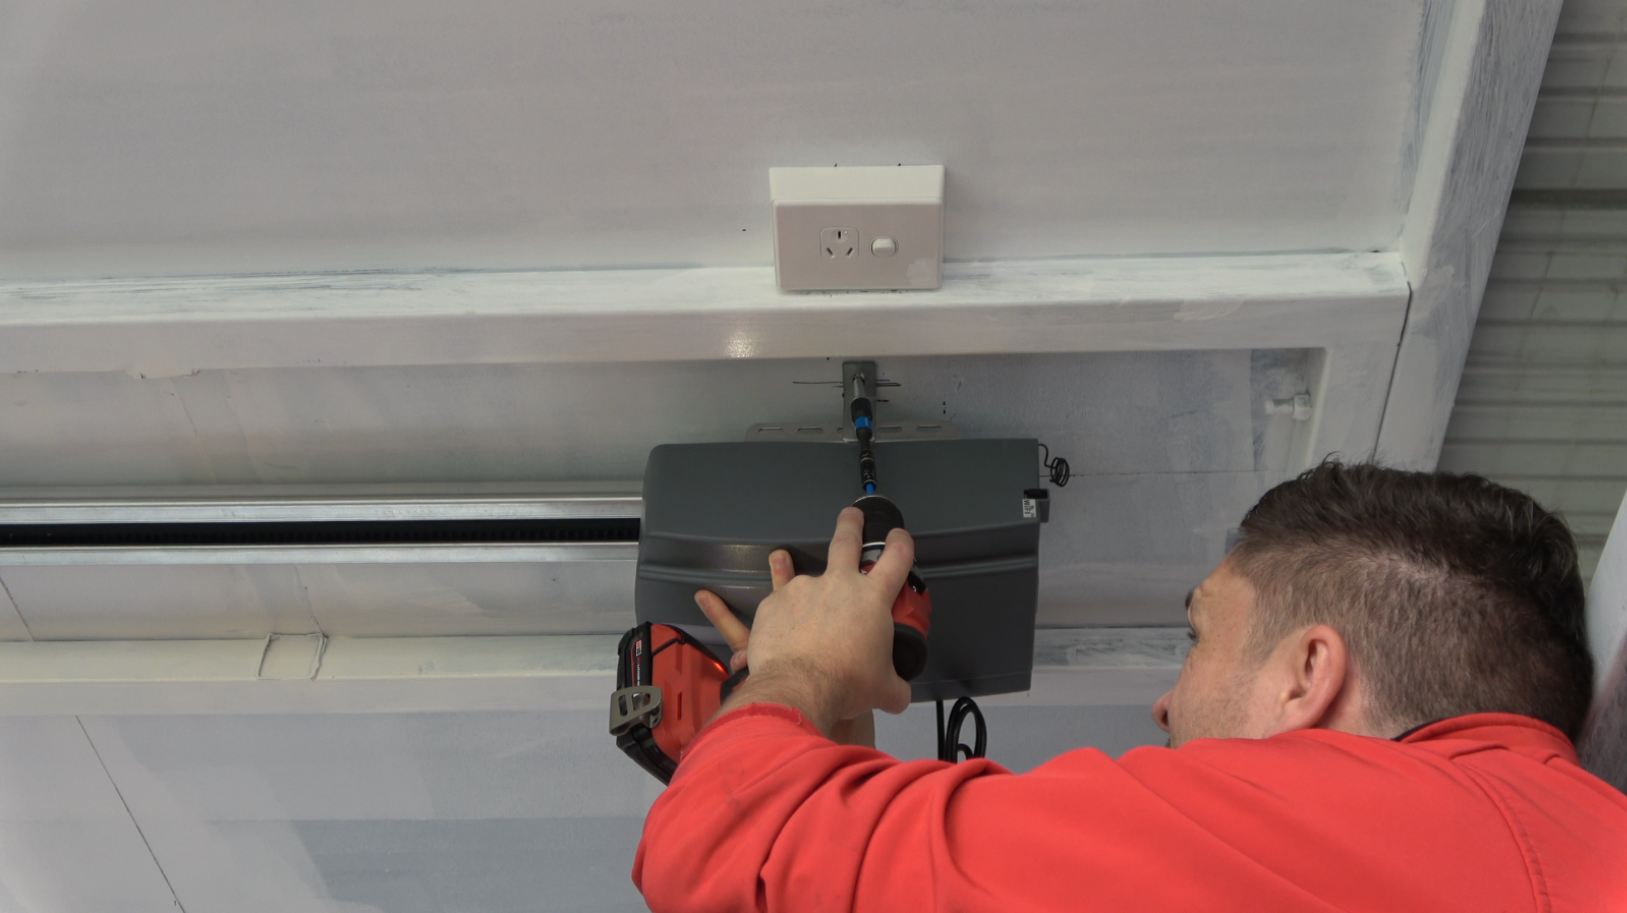
Step 8: Position and Hang the Opener
Use a ladder to position the motor so the drive rail is level. The manual recommends using a spacer at least 50mm thick to confirm that the rail clears the door at its highest point.
Loosely attach the roof mounting brackets to each side of the motor. The brackets can be shortened if required.
Fix the brackets to the ceiling, making sure they are secured into a timber or steel frame. Plain plaster will not support the motor.
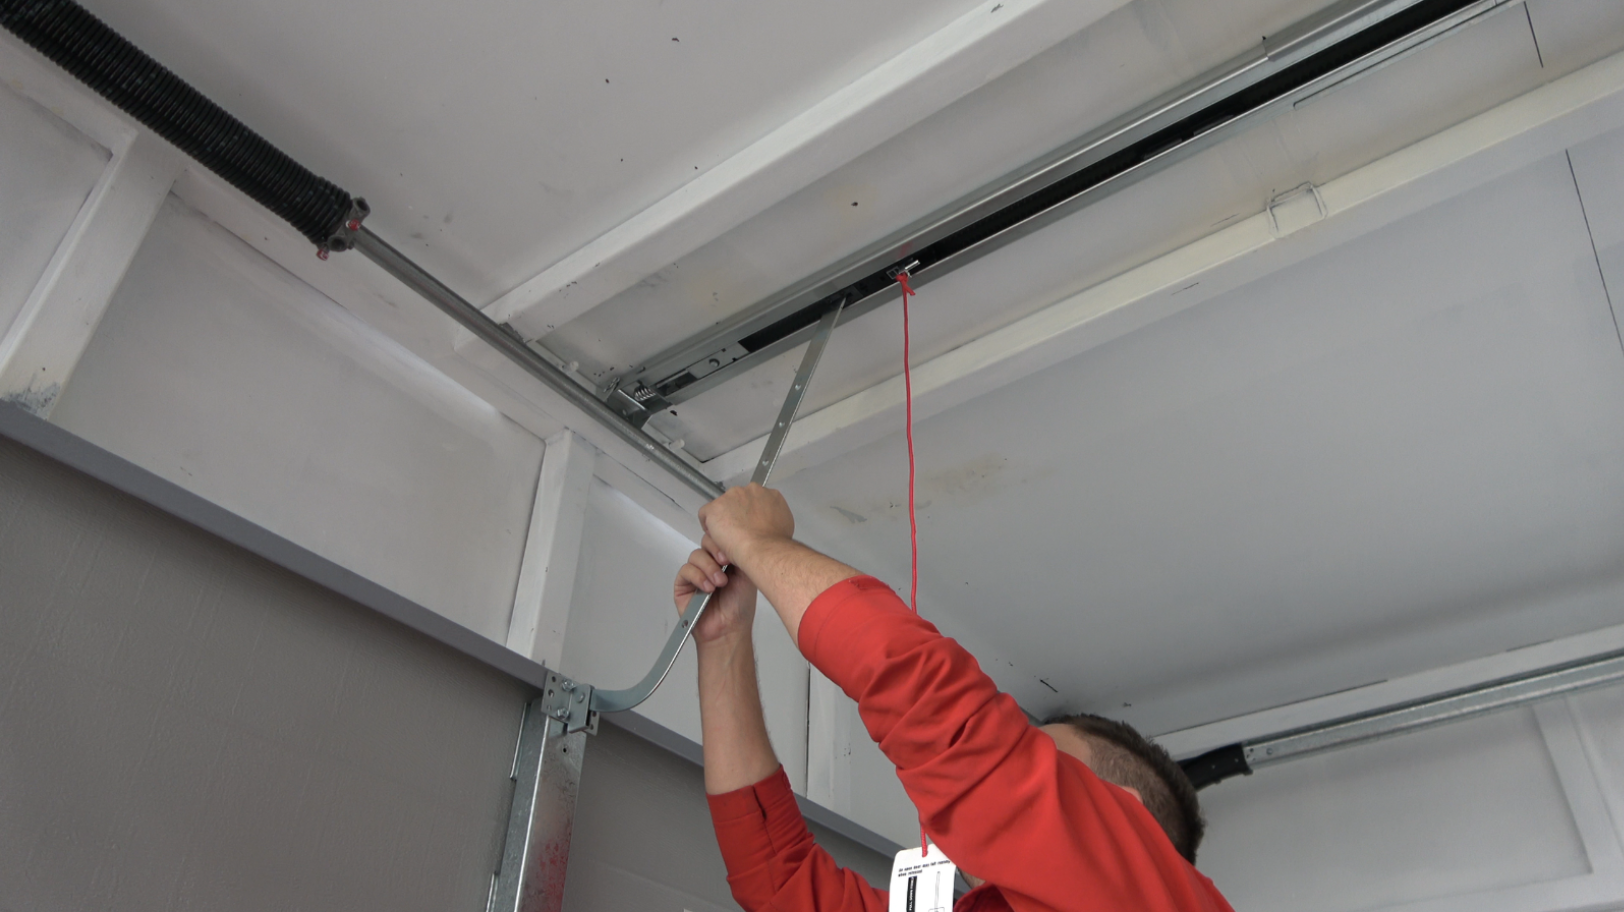
Step 9: Attach the Door Bracket and Motor Arm
Close the garage door and fix the door bracket to a structural part of the door, as close to the top edge as possible. The bracket should be centred beneath the rail and wall bracket.
Connect the straight arm from the door trolley to the bent arm using the supplied bolts, then position and bolt the arms to the top edge of the door.
Step 10: Locate the Door on the Rail
Lock the manual release by pulling the cord away from the garage door. Then manually open the garage door slowly until the trolley carriage locks into the trolley connector on the belt.
The rail and belt should now hold the door firmly in place.
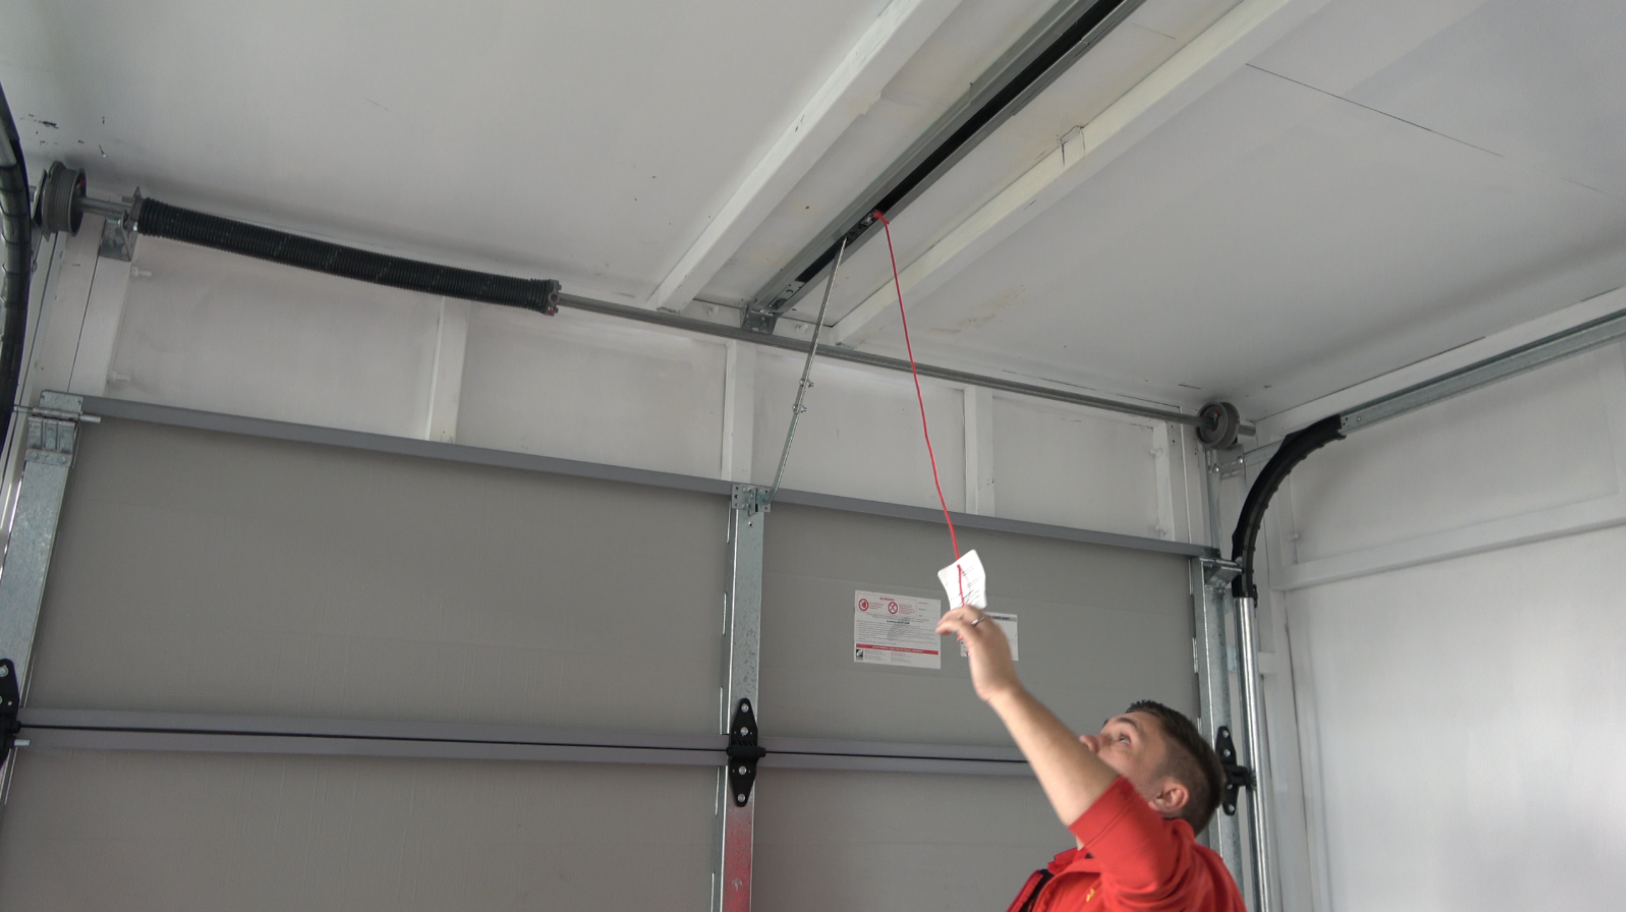
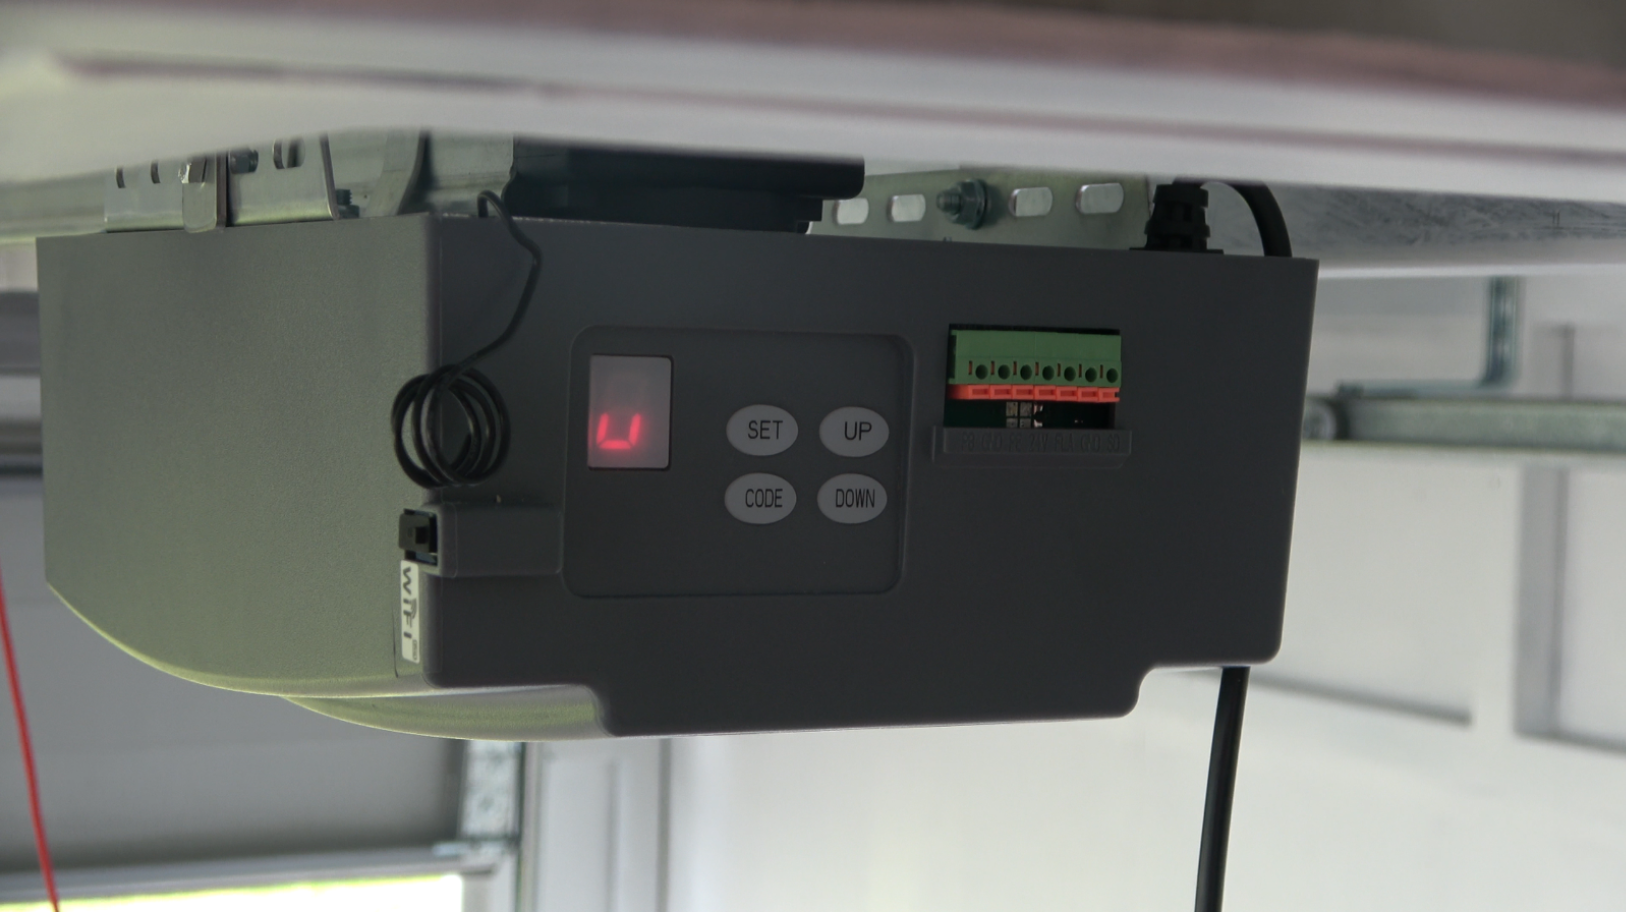
Step 11: Program the Door Travel Limits
Once the opener is installed, program the open and close positions.
Press and hold the SET button until the display shows “1”, then release it. Press SET again. The display will show “n” with a dot, meaning the opener is ready to program.
Press and hold the UP button until the door reaches the desired open position. Use short presses of the UP and DOWN buttons to fine-tune the position, then press SET to save. The display will then show “u” with a dot.
Next, press and hold the DOWN button until the door reaches the desired closed position. Press SET to save.
The display will show “II”, and the opener will automatically run a full open and close cycle to calculate travel distance and operating force.
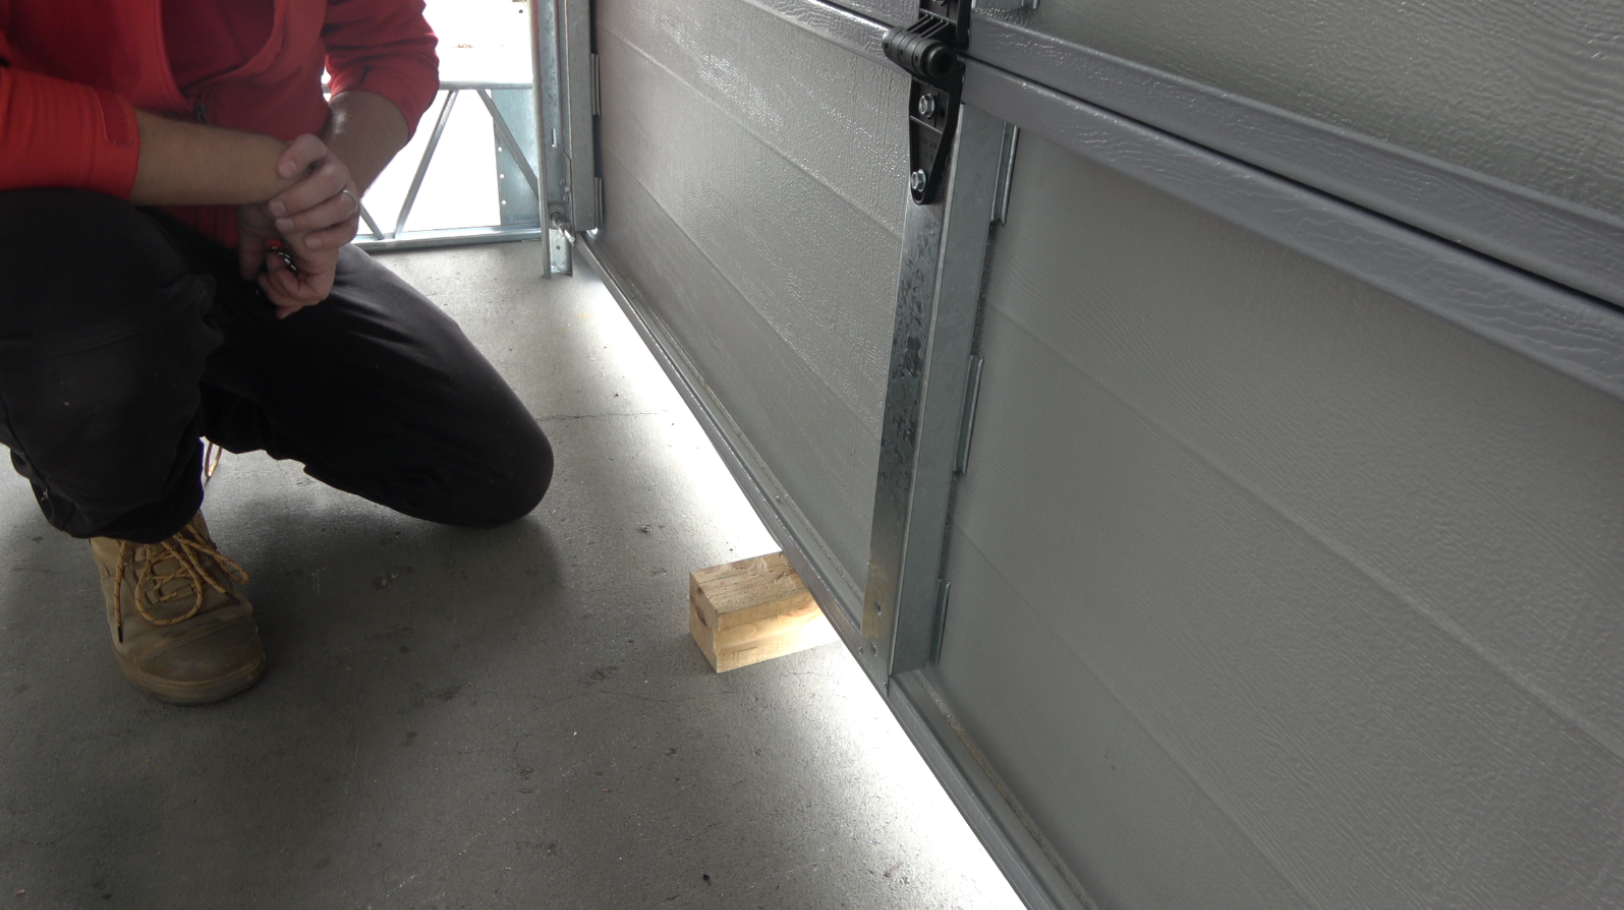
Step 12: Test the Safety Reverse System
After programming, test the safety reverse system.
With the door open, place a 40mm high obstacle flat on the floor under the door. Operate the door in the closing direction. The door should detect the obstacle and reverse.
If the door stops on the obstacle and does not reverse, repeat the travel limit programming process.
The manual recommends testing the safety reverse system monthly.
Optional: Smart Home Control
The GDR150 is compatible with Richmond’s SmartR Home WiFi Smart Switch GTR131, allowing smartphone control through the SmartR Home app.
For safety and compliance, infrared photocells GTR182 or safety beams must be installed when the door is operated remotely without direct line of sight. Auto-close also requires safety photo beams to be fitted.
Maintenance Tips
Regular maintenance will help extend the life of the garage door and opener.
The manual recommends keeping the door operating area clear, checking that the motor and rail operate smoothly, and testing the safety reverse function monthly.
Quarterly checks should include inspecting rollers, hinges, and rail condition, lubricating where required, and testing manual release operation.
Avoid using standard WD-40 or CRC as a lubricant, as the manual notes these may attract dirt and dust and may not provide correct lubrication.
Need Help?
For installation or troubleshooting assistance, contact Richmond Rolling Solutions technical support.
You can also browse Richmond’s full range of garage door motors and accessories online.
Website: richmondau.com/gate-motor-support/
Email: [email protected]
AU: 03 9070 5713
NZ: 0800 61 71 81